

First of all, please read the “5 Golden Rules” carefully. These contain important information that you should consider before launching the drone.

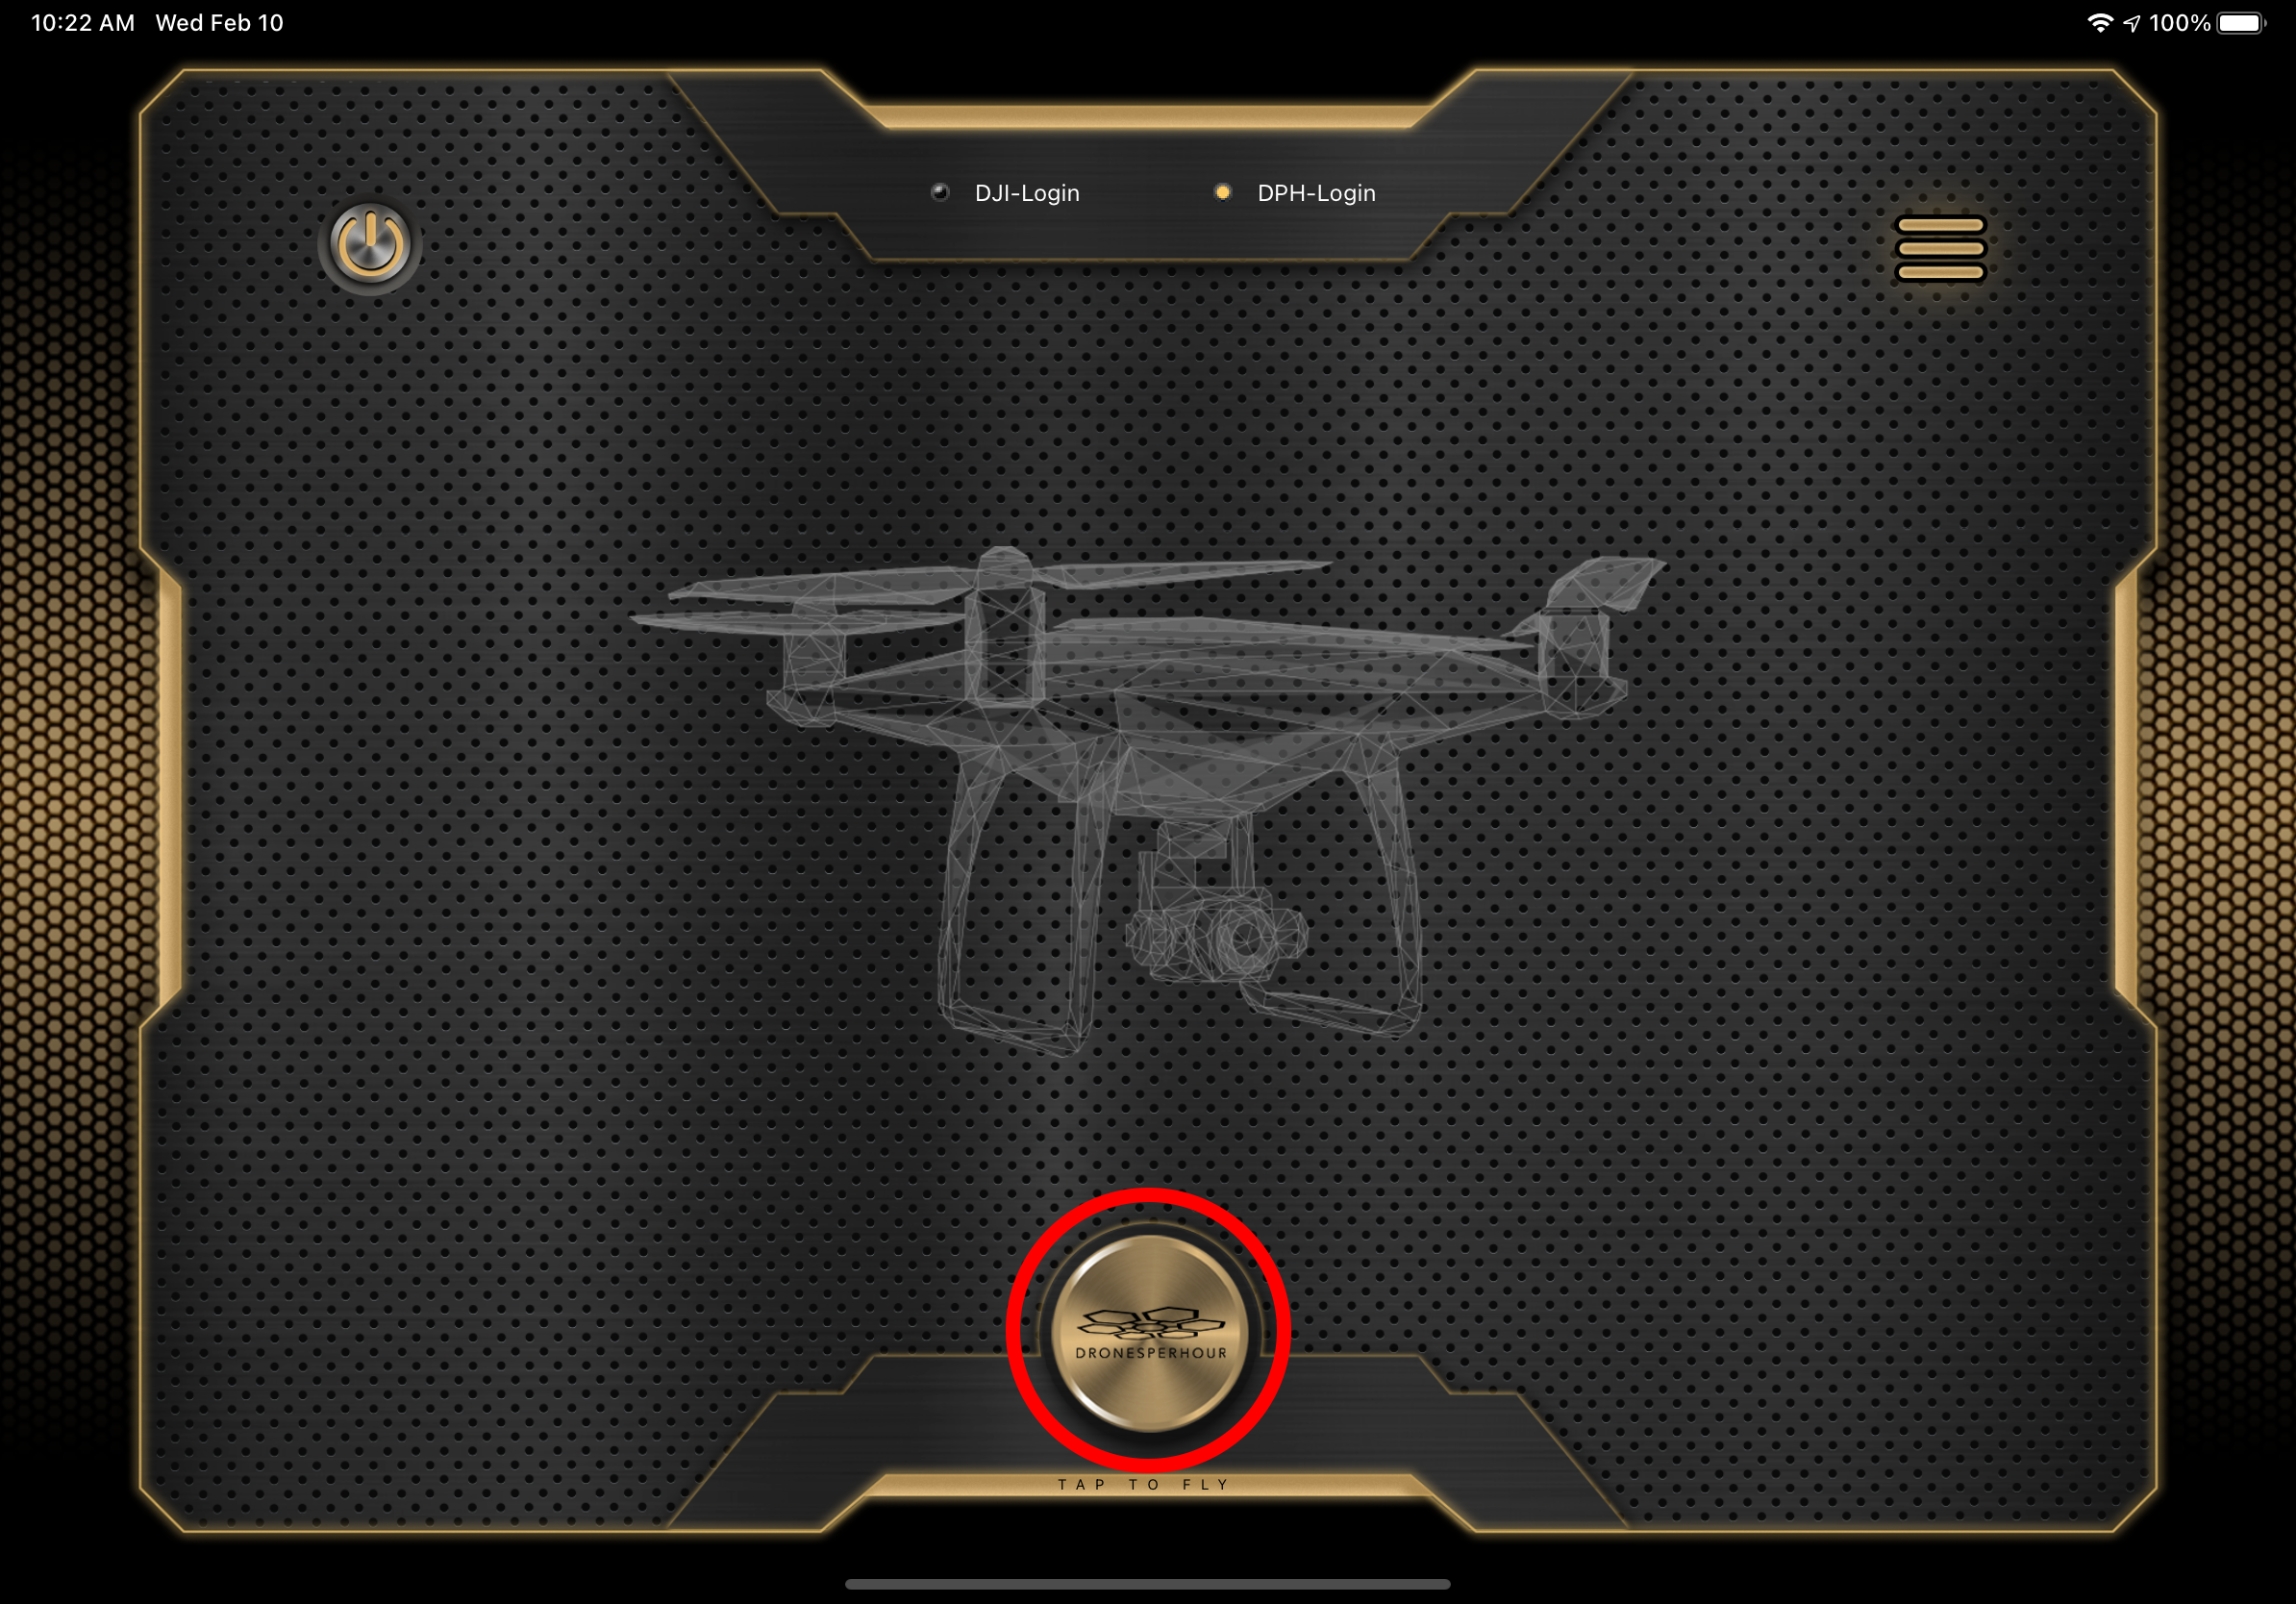
Then log in in the main menu via the DPH login with your personal access data. If you don’t have an account yet, you can register for free to set up to 10 waypoints.
For UNLIMITED waypoints and additional features, get one of our premium plans in our store! Currently we offer three plans in our store; the Professional plan, as well as the Business and the Enterprise plan. You can find the link to the store here. (Also in the main menu of the app) When you are logged in, the dot to the left of “DPH Login” will light up in gold.
- Tap the drone or the Dronesperhour button in the main menu.

Now you see the map view and can start planning your mission. (In the web app, the map view appears immediately after login).
In the upper left corner of the map you can either select the “Pen” for an individual route drawing or the “Plus” for a pre-programmed flight template.
For individual route planning (i.e. when you have selected the pen) you simply draw with your finger or the mouse over the screen to set the desired route. Alternatively, you can also tap or click points on the screen, which are then automatically connected in a straight line. If you make a mistake, you can discard the route with the trash can button and draw a new one. If you like the route, click on the checkmark that appeared in the upper left corner and the app will automatically set the necessary waypoints along the flight route.
If you want to use one or more of the pre-programmed flight templates, click the “Plus” in the upper left corner of the map. Depending on which license you are logged in with, different flight templates will appear in different categories. These are automatically placed on the map by a simple click and can be customized in numerous parameters.
Starting with the Professional plan, you also have the option to line up several flight templates in a mission and fly them one after the other. (Multi-Mission).
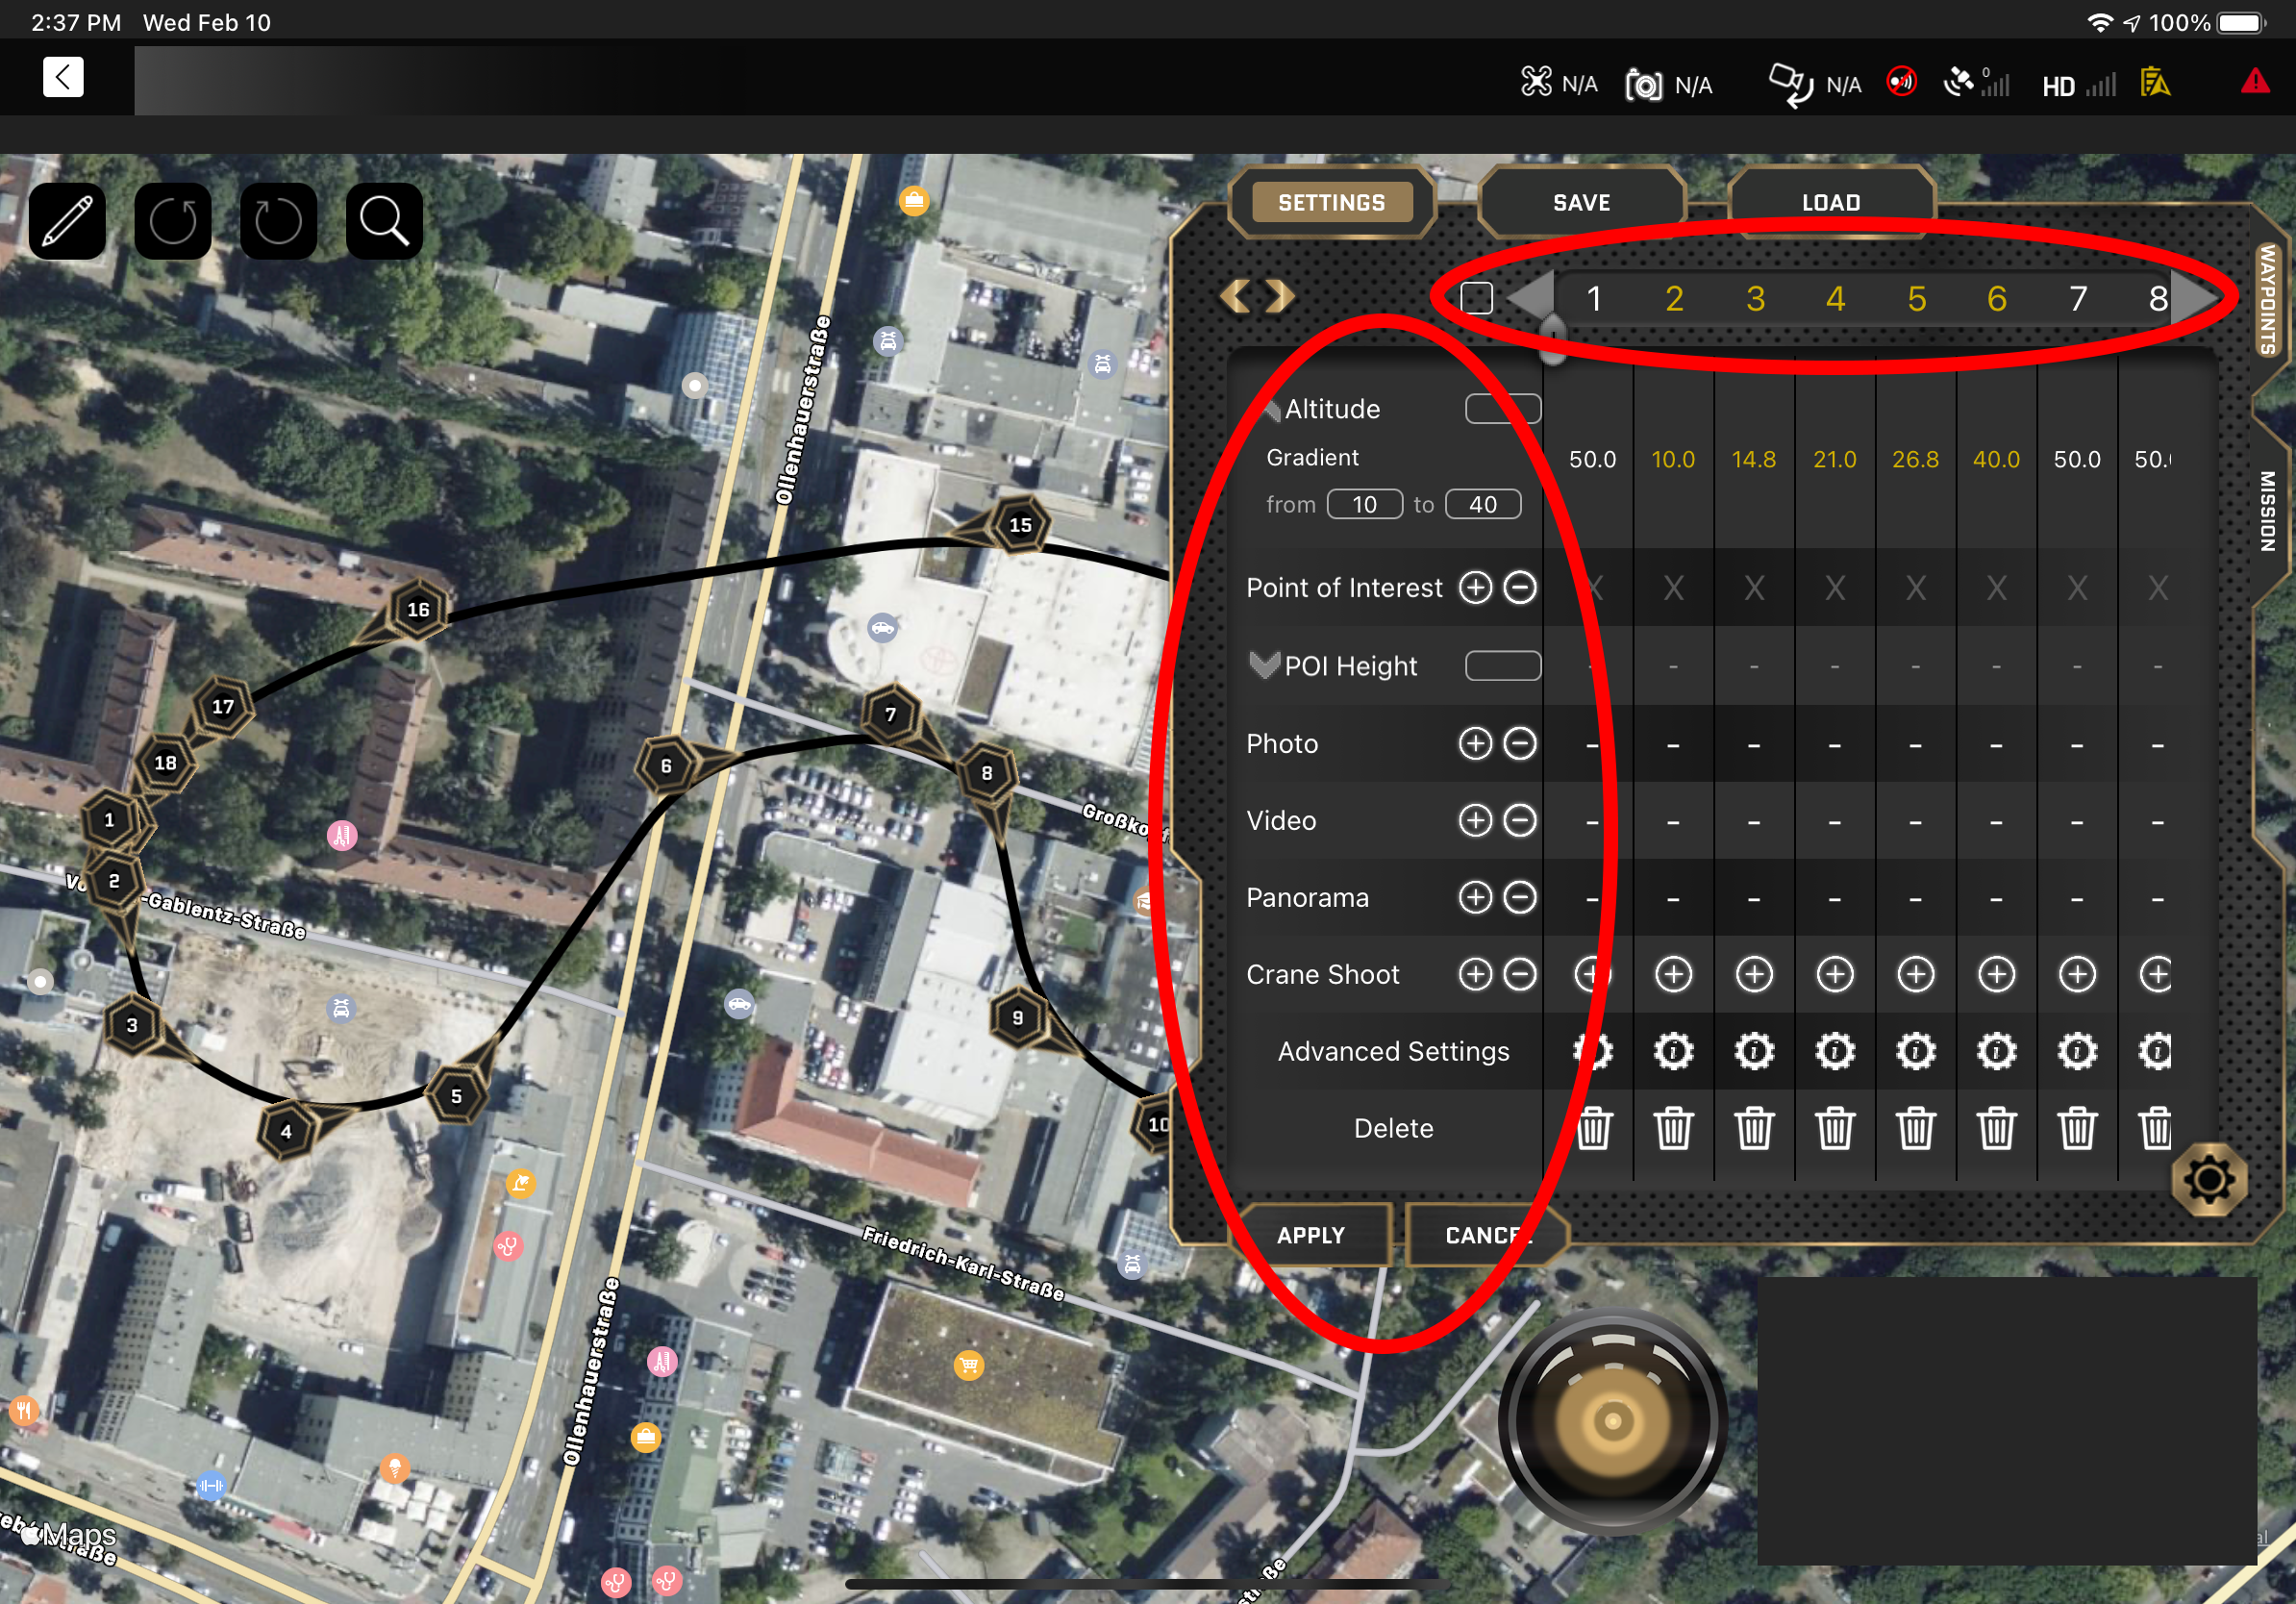
After you have successfully placed the flight route, the menu appears, in which you can change the individual waypoints both individually (1) and several (2) or even all at the same time (3) in various parameters and move them by clicking and holding (4). You can change the waypoints according to your ideas, but also add more waypoints (5) or delete some (6).
Individual editing
Select several or all at once at the top and edit with the options on the left.In the Mission menu tab, you can, for example, change the drag & drop mode from “Move single object (waypoint)” to “Move whole mission” or change the speed of the whole mission. (We recommend to leave the speed at 1 m/s for the first flight of the mission to be able to intervene quickly).

- Start the mission by holding the GO button for about 3 seconds.
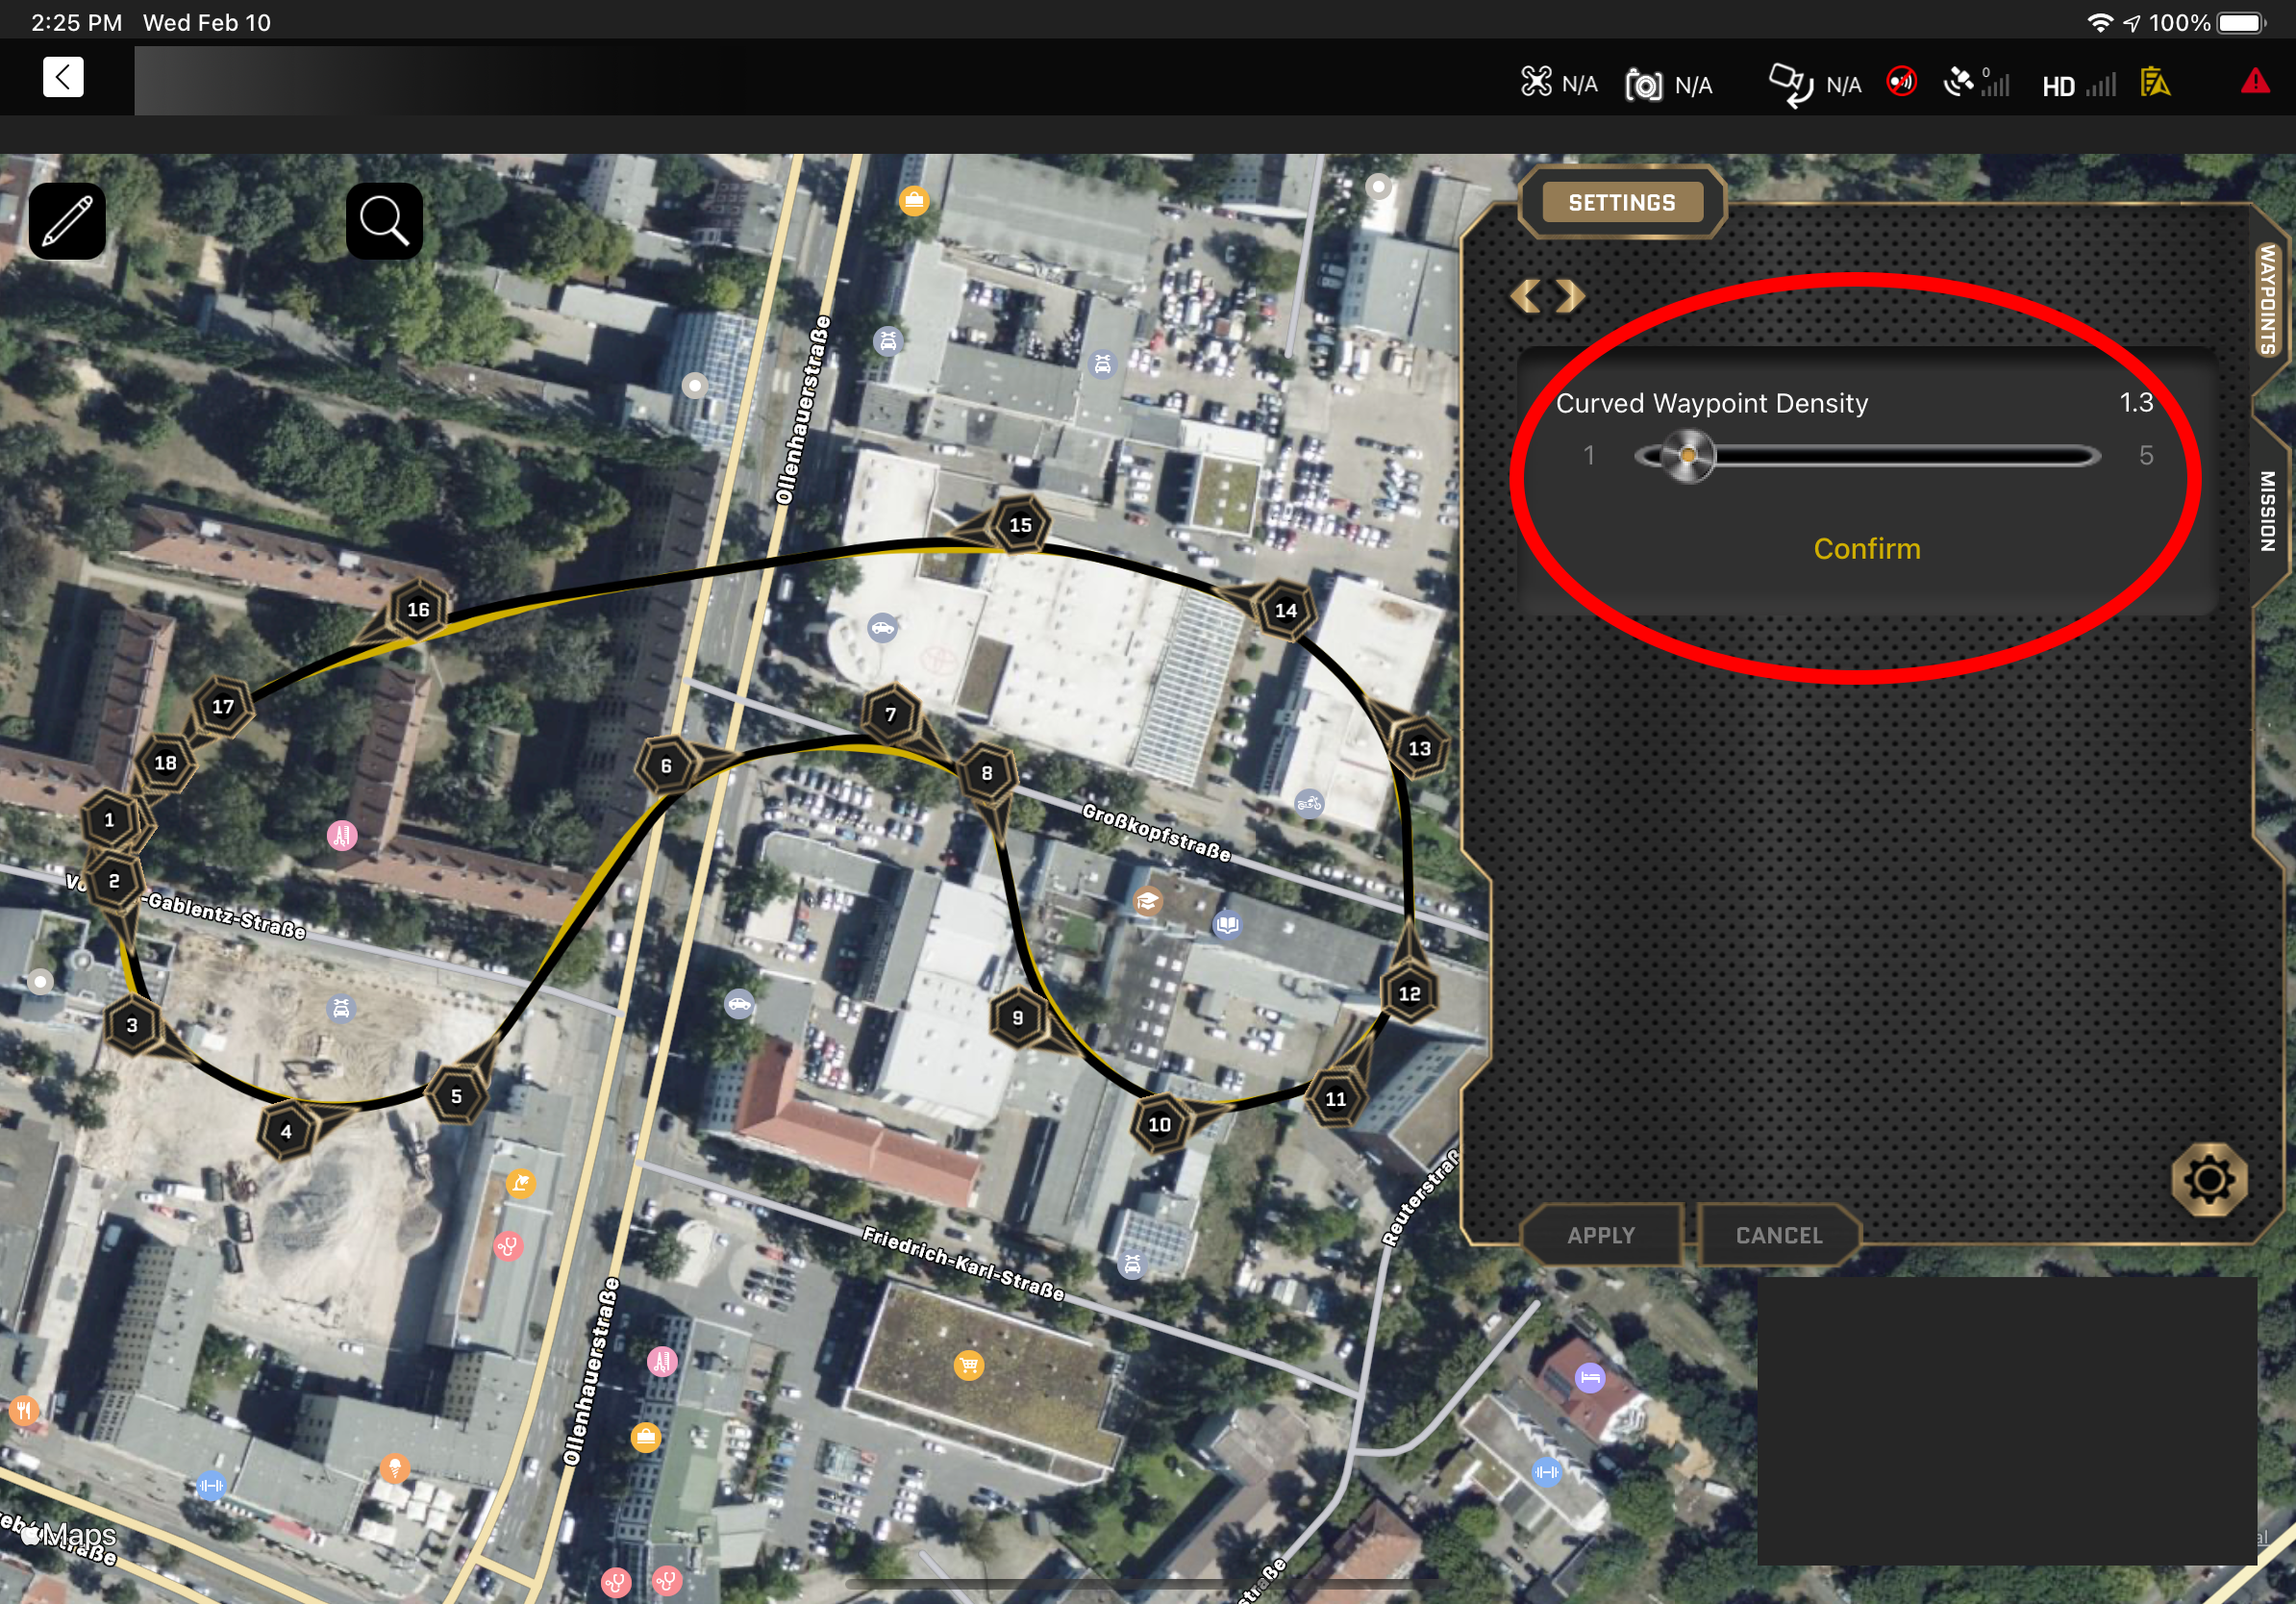
(OPTIONAL) You can also manually adjust the waypoint density setting in the main menu under “Settings” if needed. (A higher density allows tighter turns, but the default density (2) is sufficient for most missions).
If the calculated flight route (black) deviates too much from the drawn route (yellow), the waypoint density should be increased. Otherwise, a waypoint density as low as possible should be selected.


With the free version without registration you can fly mission with up to 5 waypoints. If you register for free on our website, you can set up to 10 waypoints. In the two free plans you have no additional features such as the pre-programmed flight templates, cloud storage, multi missions, web app and 3D modeling.
If you buy one of our Premium plans in our store, you can plan with as many waypoints as you want and additionally, depending on the plan, the following features are available:

Of course. Just visit our store and choose the premium plan that suits you best. You can pay conveniently via PayPal, SEPA direct debit, debit or credit card, and much more.
If you have registered with a different email address, simply enter the email address you want to have upgraded in the optional order notes. If you forgot this step or you noticed it after the order, just write us a short mail with your request and we will of course take it into account.
Currently we offer three plans in our store; the Private Plan as well as the Professional and the Business Plan. Click here to go to our store.
If you have any questions or are interested in an Enterprise plan, please contact us using the contact form, directly by email at contact@dronesperhour.com or by phone at +49 30 80098104.
Exactly. You can log in to both the web app and the app for smartphone and tablet under “DPH Login” using the access data for the premium plans that we sent you by e-mail.
If you have purchased a premium plan in our store, you can check how long it is still valid in the “Advanced settings” in the main menu.
After expiration you can purchase another license at any time, your missions will of course remain stored in the cloud.
You can use the “DJI Login” to log in to your DJI account. This might be necessary if you want to fly in special flight zones, such as near airports. To create a DJI account you only need your email address.
For mission planning and/or flying outside of no-fly zones, you do not need to log in with your DJI account.
Basically, depending on the DJI drone, you need either the DJI GO 4 app for the Mavic, Mavic 2 and Phantom series or the DJI Fly app for the Mini, Mini SE, Mini 2, Air 2, Air 2S and the Mavic 3 exclusively to connect the drone to your controller.
In the One Click Drone app for DJI drones, you can then already make all the important settings such as maximum flight altitude or RTH altitude or calibrate the compass. In addition, you can of course fly manually with the drone, change camera settings and take photos or videos. The biggest advantage of the One Click Drone app is that in addition to manual flight, you can plan waypoint missions according to your individual preferences and have the drone fly them fully automatically. This function is only possible in a very primitive form with the DJI GO 4 app and not at all with the DJI Fly app.
Thus, the One Click Drone app is your app for manual flight as well as for easy planning and flying of more complicated maneuvers and aesthetic drone shots in just a few clicks.
The One Click Drone app is currently compatible with the following DJI drones:
Mavic 2 Pro, Mavic 2 Zoom, Mavic Mini, Mavic Air, Mavic Air 2, Phantom 4 Pro, Phantom 4 Advanced and Mavic Pro.
Soon to be joined by the Mini SE, Mini 2 and Air 2S.
That’s right. In our web app (from the Private plan) you can comfortably carry out your mission with all waypoints and mission settings from anywhere in the browser, just like in the app for smartphone or tablet. The only difference is that you can only start the mission with the mobile app. So if you plan your mission in the web app, save it easily in your profile on our cloud and retrieve it on the spot with your smartphone or tablet and start the flight.
Yes – just click on Status/Ready to GO (Vision) in the upper left corner. (Yellow here, but can also be green or gray if no drone is connected) In the checklist you will see the current status of your drone. You can calibrate the compass and set the RTH altitude. If you don’t set these, our app will automatically take the settings from the DJI app.

Yes – you can manually speed up or slow down the drone by moving the right joystick forward or backward. The route remains exactly as you planned it before, the drone just speeds up or slows down.
Sure – just click on the drone’s camera view in the lower right corner and the map view will switch with the drone view.
Yes – click on the camera view at the bottom right and then on the three sliders on the right. The camera’s default setting is set to “Automatic”, but you can of course adjust it manually depending on lighting conditions or special wishes.
No – for the safe flight of the drone and the automated control of our app, a good GPS signal is essential. We always recommend having at least 8 stable satellite connections before you launch. Also watch out for solar storms in preparation, they can significantly affect satellite signals. But don’t worry, even if the GPS signal fails, you can still control the drone and land safely. We recommend flying in Atti mode (flying without GPS) for such an unlikely event.
The captured photos and videos are stored either on the drone’s internal memory or preferably on the SD card if you have inserted one before launch. Remove the SD card after your mission and download it to your computer. If you did not bring an SD card, connect your drone to your computer with the USB cable and download the photos and/or videos.
Additionally, you have the option to stream your missions live on your social media channels, but these are usually not saved.
You have the choice between a constant flight altitude during the whole mission and an altitude progression.
- The default altitude for all freehand missions and flight templates is 50 meters from the starting altitude. After confirming the flight route, you can adjust this altitude according to your preferences under the first item in the waypoint settings for the entire route. You can change the altitude of each waypoint individually. (See point 5. at “Tutorials as click route – How to plan a mission)
In this first example we have set the altitude on the complete spiral to 50m:

- In addition, you have the option of flying an altitude gradient for all missions. To do this, first select all waypoints (1.), then enter a course according to your preferences (2.) and finally click on “Apply”(3.). The app automatically calculates the perfect linear ascent from the first to the last waypoint. The same applies to the POI elevation. (See next point.)

No – you can already plan your mission conveniently from anywhere on your smartphone, tablet or in the web app (from Private Plan) and save it on the device or in the cloud and load it on site (from Professional Plan). If you do not yet know the conditions on site and want to get an idea yourself beforehand, you can also plan the mission on site on your smartphone or tablet without the drone having to be switched on or connected.
- First click on the checklist bar at the top left above the map.
- After the checklist is expanded, click on “Calibrate” in the “Compass” line.
A short tutorial will appear on how to calibrate the drone’s compass. The drone must be calibrated both horizontally and vertically. We recommend that you stay as far away as possible from buildings, cars and other metal structures.
Click/tap and hold the point of your choice for a short moment until it “jumps” up a bit. Now you can push or drag the point to the place where you want it to be. If the waypoints are too close together, you can simply zoom in a little further on the map.
If the numbers or parameters in the mission menu are highlighted in gold, it means that the set values have not yet been applied/saved. Click on “Apply” in the lower left corner and the color should change to white. If the waypoint numbers are highlighted in gold, it simply means that these waypoints are selected for editing.
Flight altitude is the altitude of the drone during the mission starting from the starting point.
- The Point of Interest (POI) altitude is the altitude that the camera focuses on.
- For example, if you set 0 m, the gimbal/camera angle will adjust so that this point on the ground is permanently in the center of the image or video.
- However, you can also set the POI height to 20m to have, for example, a tree or an upper floor of a house in the center.

- In addition, just as with the height of the drone, you can set a progression from 0 to 67 meters, for example, to film a column, mast, etc. from the bottom up.

Starting with the Professional plan, you have the option to string together several flight templates (panorama, crane shot, fly-by, close-in, slider, orbit and spiral), but also freehand drawings in a mission and fly them one after the other.
To do this, first click on “Add to current mission” at the bottom right of the flight templates and then select your desired Movie Maker template. You can place it on the map and adjust it as usual. After confirming the parameters, the waypoints will be added to the current mission. You can use as many different flight templates as you like, so there are no limits to your creativity!
The waypoint density is the distance between the individual waypoints on the flight route. The higher the waypoint density, the closer together the waypoints are (minimum distance of only 0.5 meters) and the smoother and more filigree the shots become. However, the high number of waypoints also lengthens the mission duration, so a high density is recommended for short filigree missions and a higher density is more appropriate for longer missions.
The default waypoint density (2.0) is quite sufficient for most missions. However, you can also adjust it manually for each mission. To do this, activate the slider for manual waypoint density in the settings in the main menu.
Yes, but not while the drone is flying the mission. To adjust the flight path, click “Cancel” and the drone will immediately stop the mission and hover at the location. While the DJI drone is holding the position, you can adjust or re-plan the flight route as you wish. Then click Start again for 3 seconds and the drone will fly to the first waypoint and start your mission.
It is only possible to take a photo and a video at the same time at the first and last waypoint, otherwise the video recording would be interrupted during the mission. However, you can, for example, take photos from waypoint 1-7 and then start with the video from waypoint 7 or alternatively fly the mission twice and take photos once and videos once on the same route.
Check the order of connection with the app:
First the remote and the drone must be connected, then connect the app to the remote.
- You have reached your limit of waypoints:
- Without registration you can use 5 waypoints for mission planning, after free registration up to 10 waypoints and if you buy a premium license/paid plan in our store, you will enjoy the privilege of unlimited waypoints in your mission planning.
- Checklist:
- At the top left of the screen, it must say “Ready to Go” and be lit in green color for the DJI drone to take off and fly safely. If the checklist is red or yellow, please check the parameters and don’t launch the drone until it is green in color. Every now and then you need to recalibrate the compass or wait a moment until enough satellite signals are found.
Many errors can be fixed by a complete restart of the app, drone and remote control. Here is an excerpt of possible messages:
- “Timeline Event Error” If this error is displayed right after starting a mission, the mission should be aborted and restarted to avoid aborting during the mission.
- “Waypoints too close together“: All waypoints in DJI Waypoint missions must be at least 0.5 m apart. Please make sure that manually added waypoints have enough distance to the neighboring waypoints and waypoints for crane shots are at least 0.5 m higher or lower than the neighboring waypoints.
